MSI X99S MPower Review: Sting Like a Bee
by Ian Cutress on February 17, 2015 9:00 AM EST- Posted in
- Motherboards
- Intel
- MSI
- Overclocking
- X99
In our recent run of overclocking focused motherboards, we have had a couple of interesting contenders. Sub $300 is a difficult market to attack for X99 overclockers, and MSI brings the X99S MPower which is the focus of today's review.
MSI X99S MPower Overview
While we have done a number of cheaper X99 overclocking motherboard reviews as of late, including the X99-SOC Champion and the X99 OC Formula, one common feature in these reviews has been how the manufacturers are learning how to get the balance right between making something desirable but also cost effective. We have remarked that while X99 is the high end expensive platform, users can still want to pair an i7-5820K with a cheap motherboard and get a six core overclocked beast. This is the aim of motherboards like these.
The MSI X99S MPower attacks this angle with a yellow and black color scheme (or as I read once, like a bee or police warning tape) at $300, making use of onboard OC buttons and an OC Genie button for overclocking. The rest of the motherboard comes with SATA Express, an M.2 PCIe 3.0 x4 port, extra USB 3.0 ports and an upgraded BIOS/software package from X79. The last MSI overclocking motherboard we tested, the Z97 MPower Max, was a nice product which we awarded and the X99S MPower wants to follow in that path.
Where MSI delivers is that the BIOS is easier to use than previous iterations, we get an XMP button in the BIOS to easily apply memory profiles and the overall aesthetic of the design which is something a user can build around to style their system. In our benchmark perspective, MSI performs similarly to other X99 products but does not enable multicore turbo, keeping it in the lower (but more common) performance bracket when at stock speeds.
However, there are a couple of downsides for comparison. Firstly, even at $300 it ends up approaching the mid-range pricing for X99. The Z97 model incorporated combined air/water cooling on the power delivery for less, for example. One of my big issues is that OC Genie, which we get a toggle switch for two modes this time around, is still that it does not push the CPU that much. MSI lacks a testing tool for overclocking and provides only a couple of presets, both of which give only a basic overclock. Another point of contention is that the bundled software offers a chance to overclock the CPU to 2.1 volts in plain daylight, which is asking for trouble.
The $300 price point is actually quite aggressive for X99, and along with the other motherboards we have reviewed the MSI still has a few (easily fixable) issues and doesn't push the boat in terms of technology but it ran through our suite without any issues.
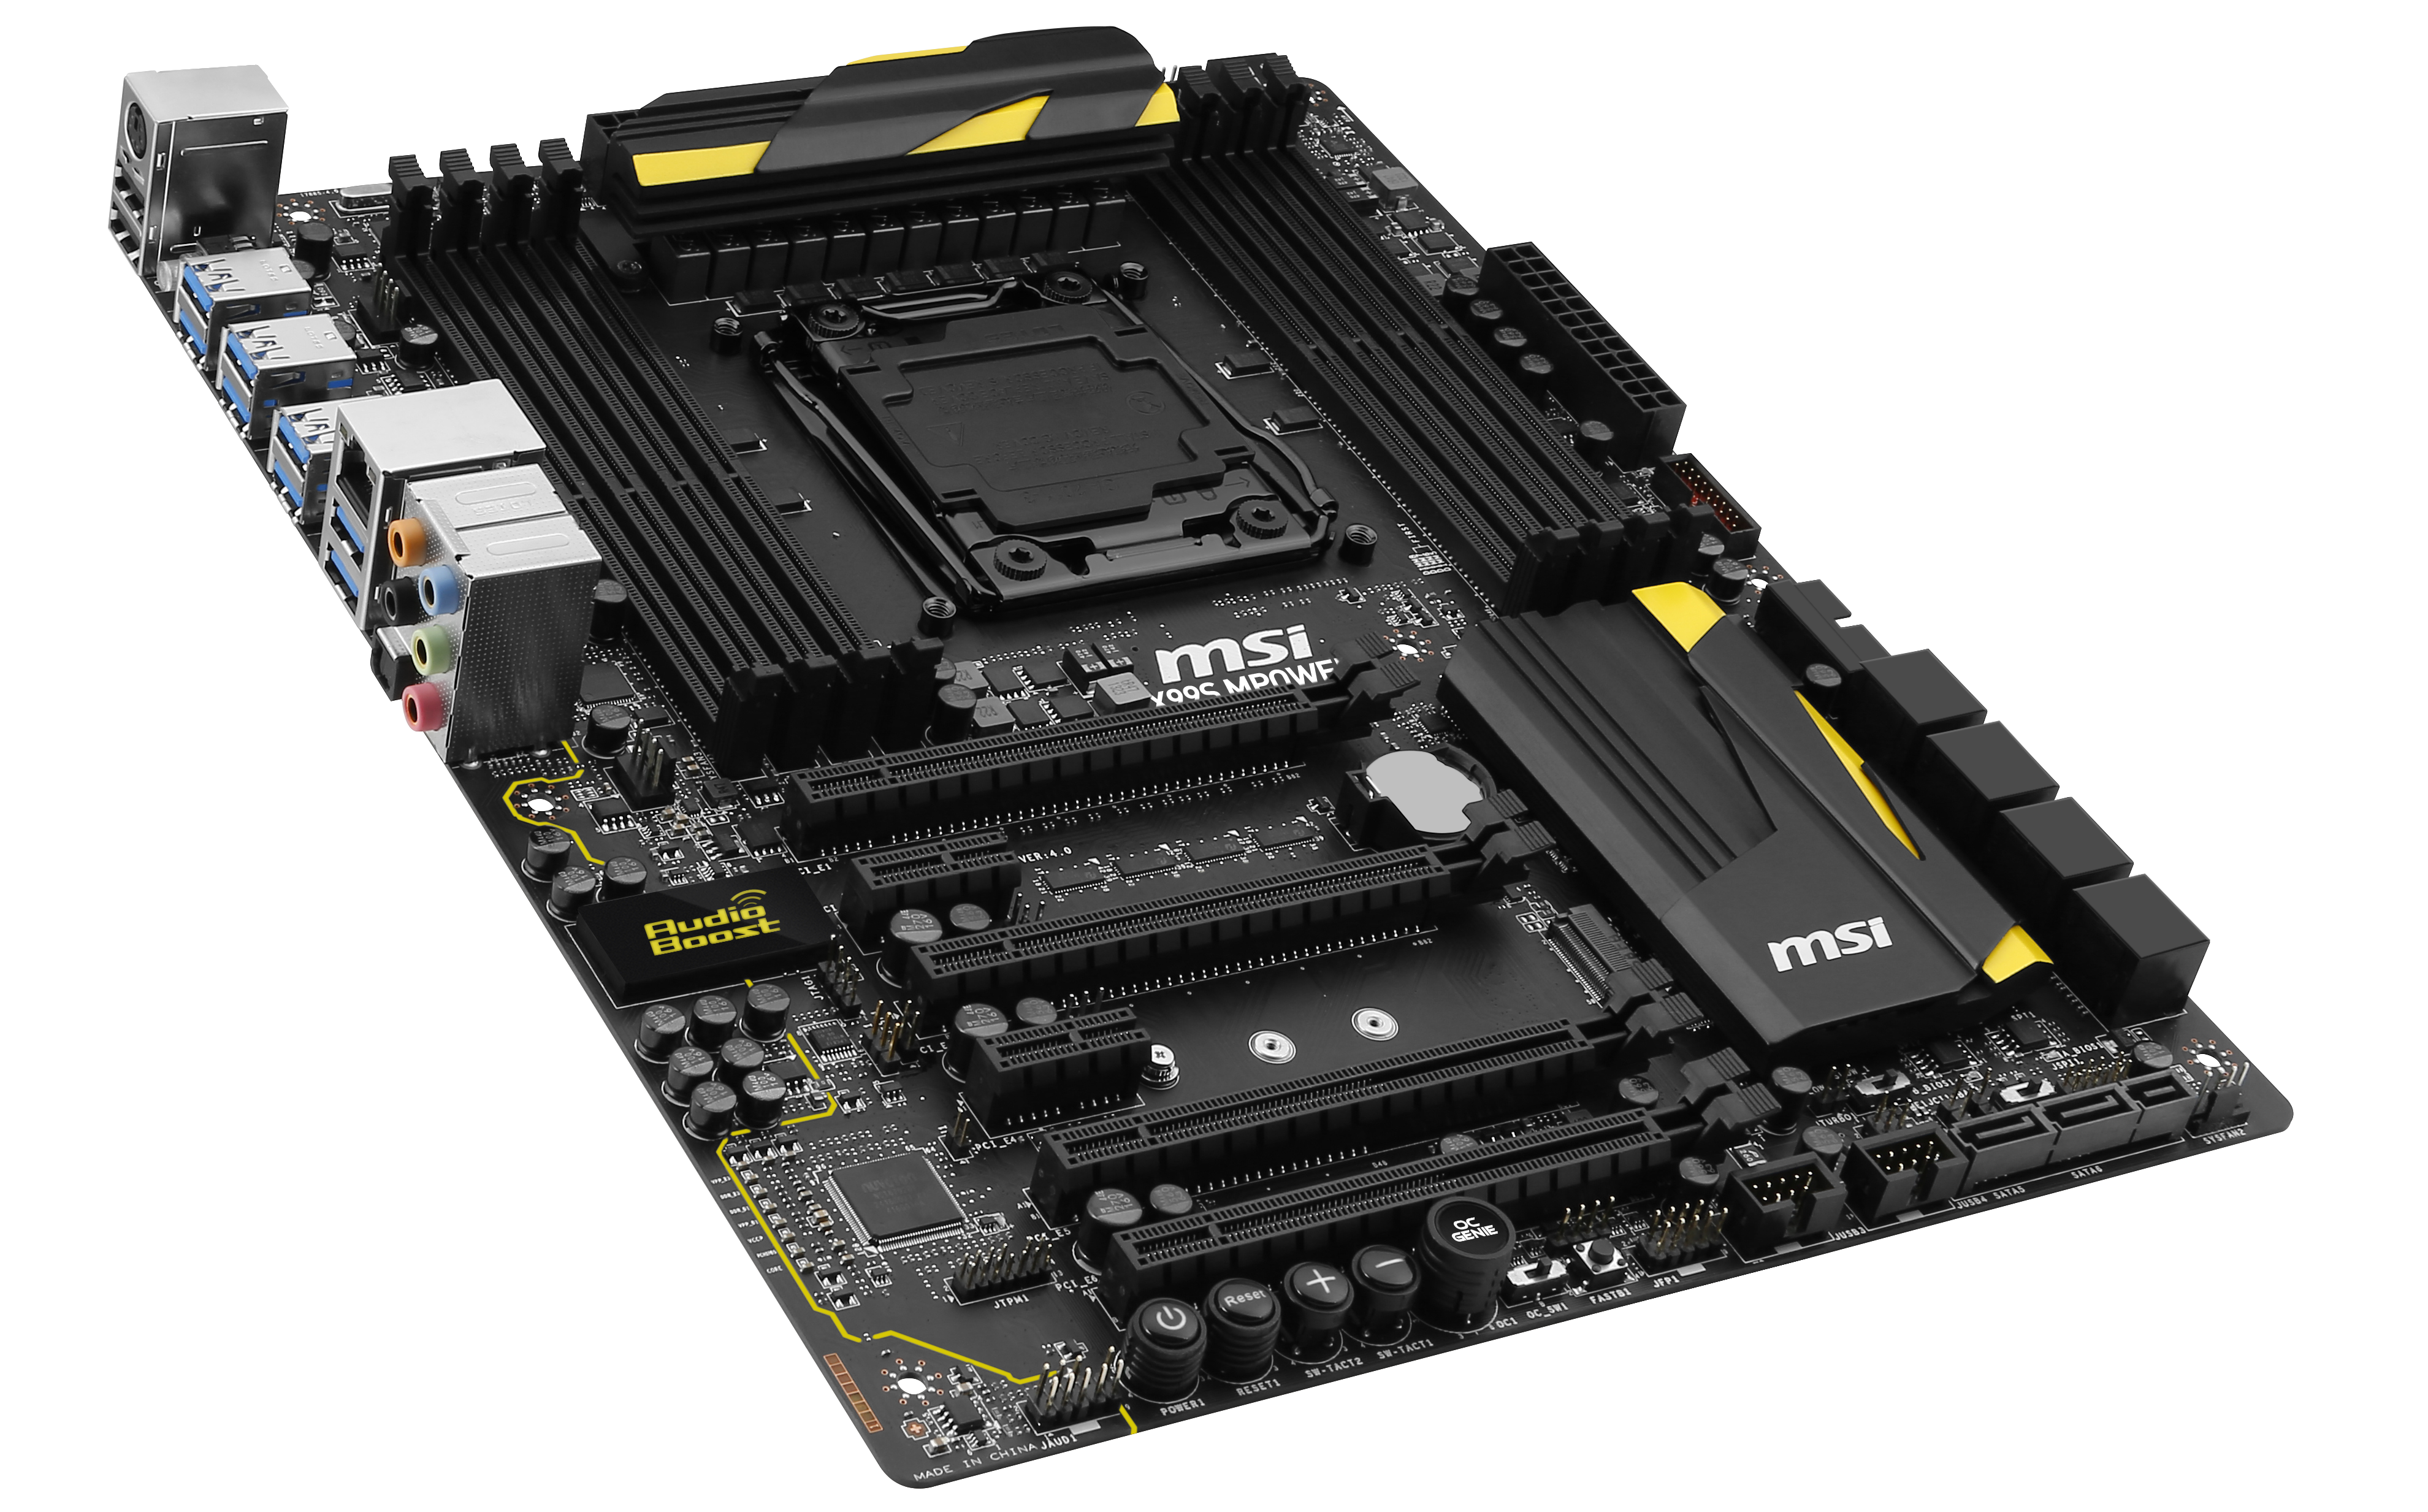
Visual Inspection
Unlike the red of most motherboard gaming ranges, overclocking colors vary from company to company. In one corner we have red, another orange, a strong yellow and muted yellow, with MSI taking the last one on that list. It is clear they want to push a combination of black and yellow, because these two together signifies danger, or something similar. The amount of yellow on the MSI OC Certified range is along similar lines to that of MSI’s GPU Lightning range as well.
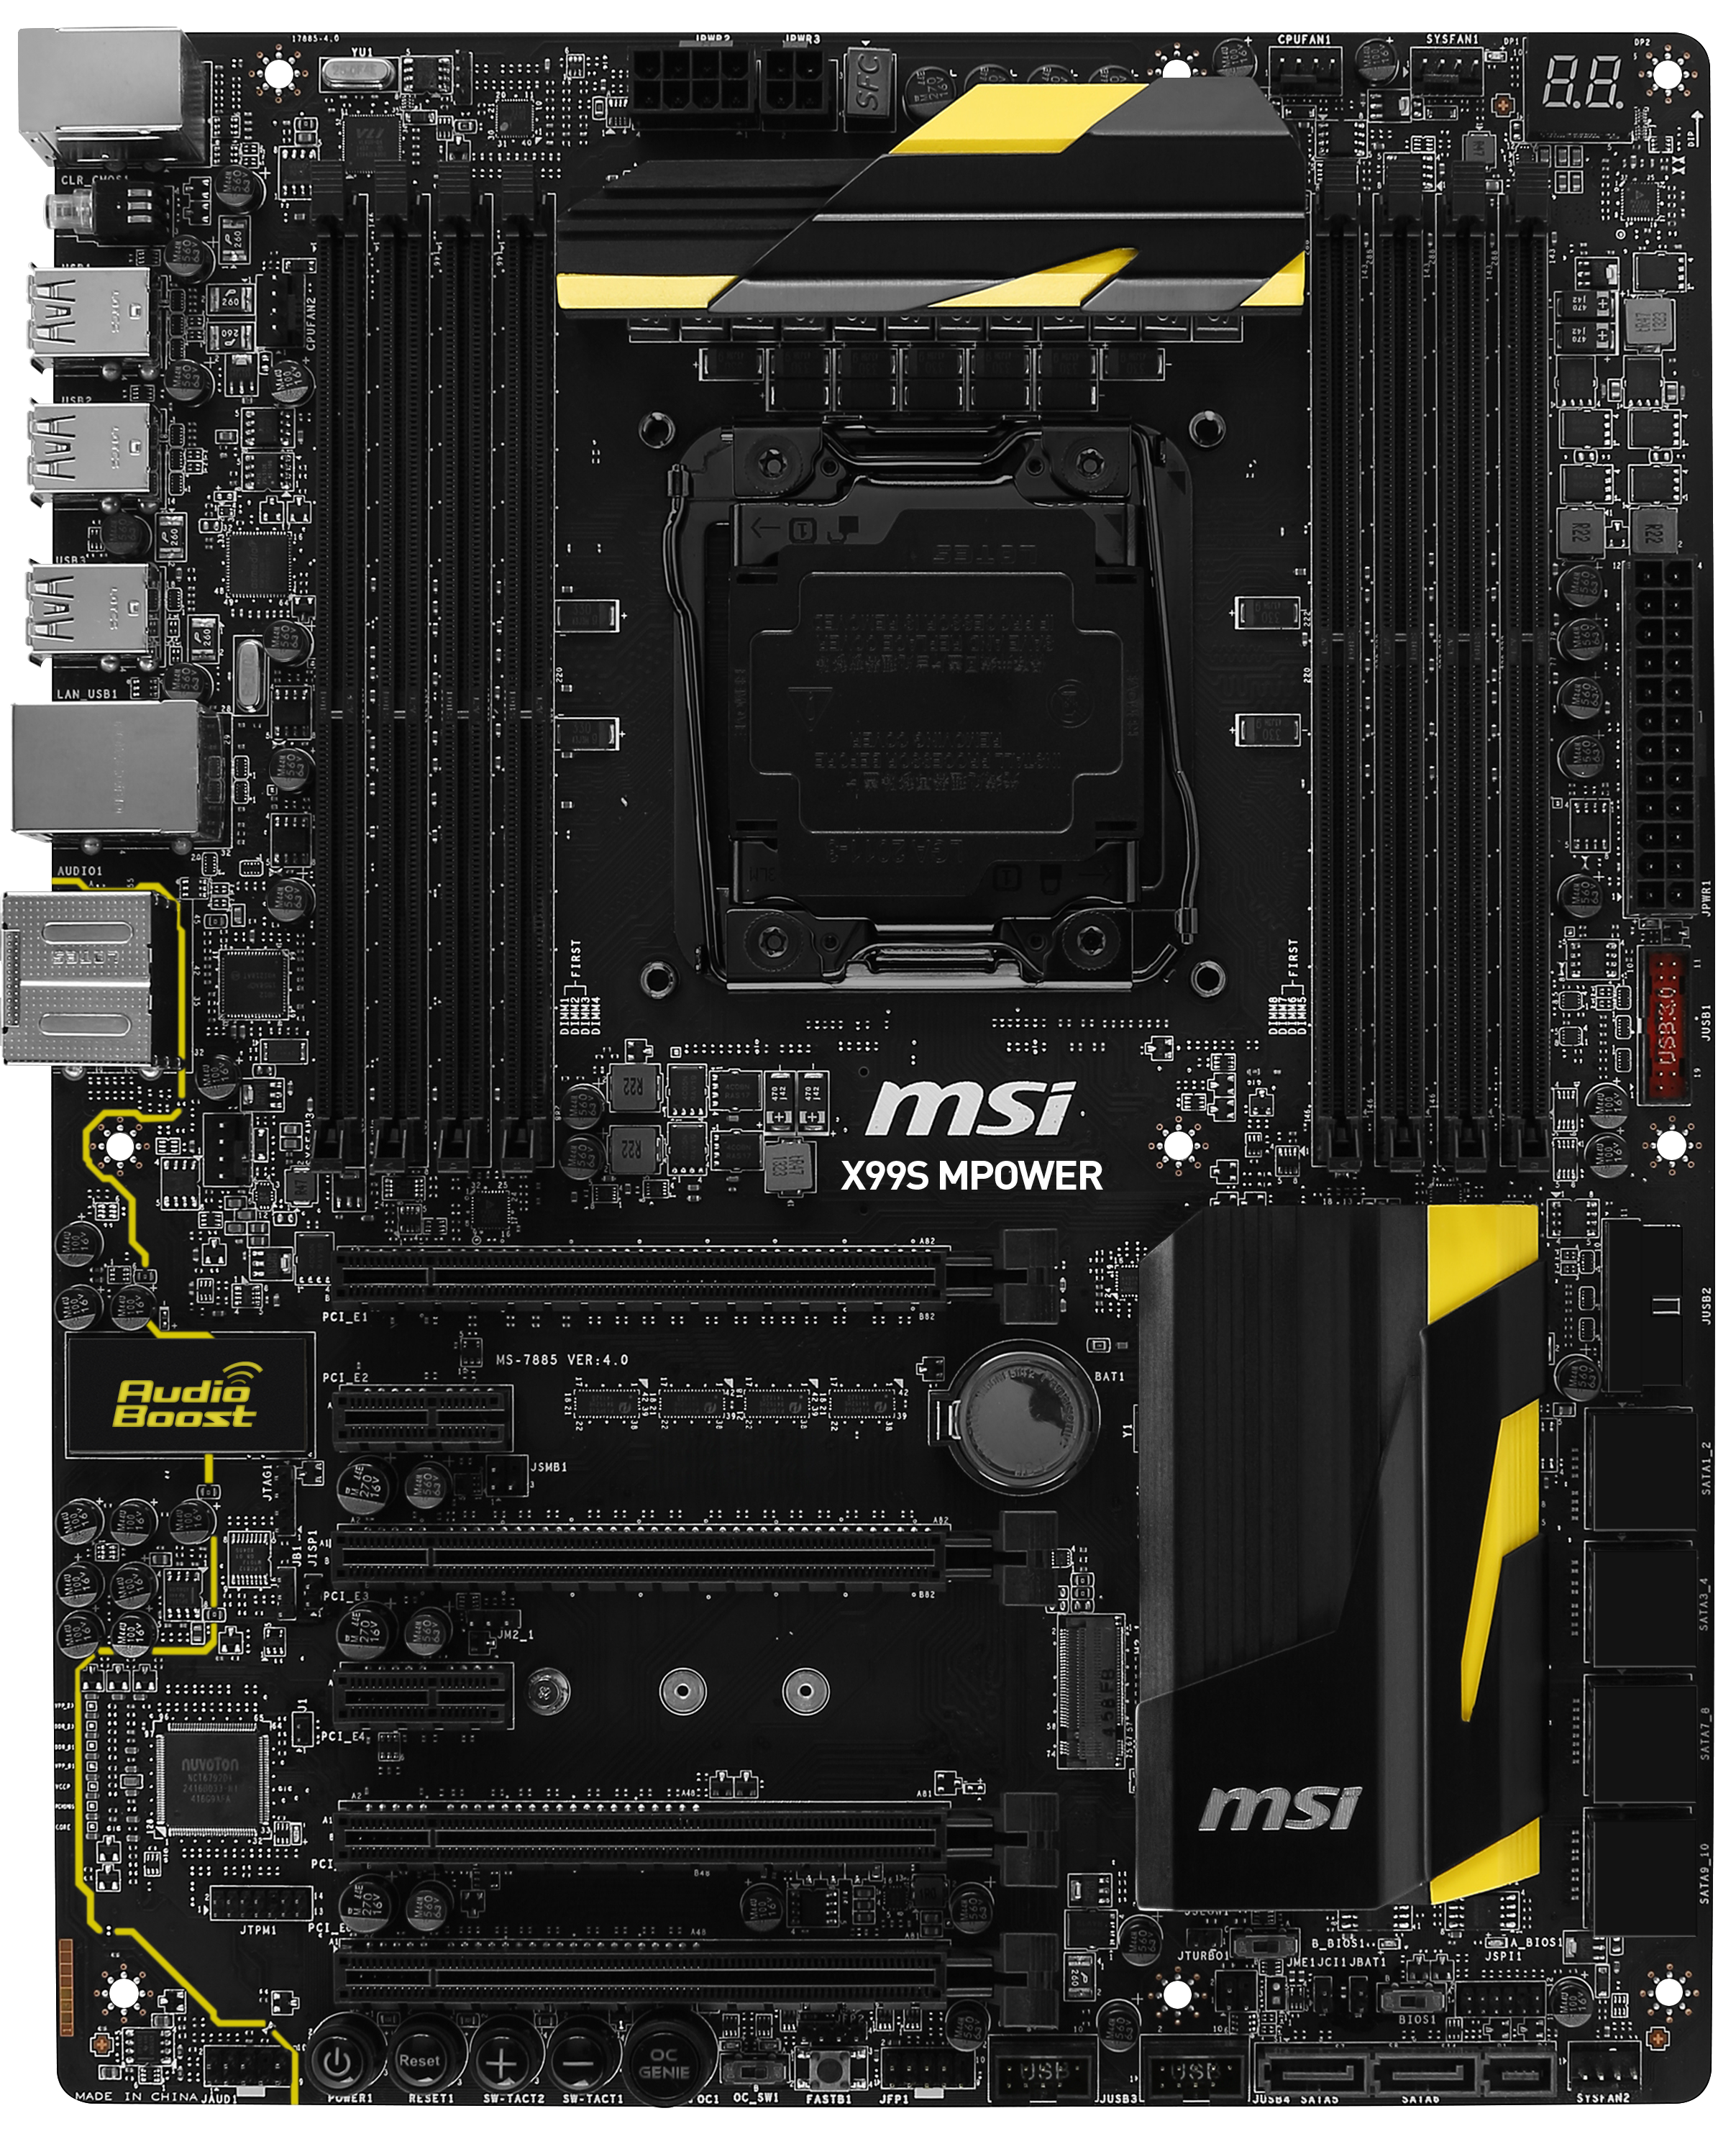
The X99S MPower uses a slightly modified CPU socket bracket which removes some of the elements to the rear side, allowing the socket area to be insulated better for sub-zero overclocking and attract less condensation with fewer metallic elements. The board has a full set of two-DIMMs per channel for memory, and although the slots are all black there is an easy-to-read guide on the board itself showing which DRAM slots to occupy first. Above the socket is our enhanced power delivery, and to keep costs down compared to the high end models the power delivery heatsink is not connected to the chipset heatsink. The socket area has easy access to four of the five onboard headers – two 4-pin CHA fans to the left of the DRAM, a 4-pin CPU at the top right, a 4-pin SYS at the top right also and a final 4-pin in the bottom right.

In the top right along with the fan headers is a two-digit debug display, useful for diagnosing boot-up issues. The power/reset buttons have been moved to the bottom of the board, which some manufacturers now prefer as the top of the board can get quite cold when sub-zero overclocking takes place over an 8-12 hour session. Below the debug display are the 24-pin ATX power connector and a USB 3.0 header sticking out of the board. This header is available for fast charging, hence the red color inside the header. We have another USB 3.0 header below this, at right angles to the motherboard and enabling cases that have four USB 3.0 ports on them. This is followed by our SATA ports, and at the bottom is a SATA Express port (with two of the SATA) sticking out of the board.

Along the bottom of the board are our power/reset buttons along with two DirectOC buttons. These adjust the BCLK frequency of the CPU in increments determined by the driver in Windows – either 1 MHz or 0.1 MHz. The OC Genie button follows, along with a switch which adjusts the OC Genie mode between two different OC levels. We test both in the overclocking section later in the review. Also on the bottom is a FastBoot button to get into the BIOS, the front panel header, two USB 2.0 headers, a BIOS select switch and a slow mode switch.
The PCIe lanes are somewhat oddly organized, requiring the first two GPUs to go into the first two full length GPU slots. So for a 40 PCIe-lane CPU, we get x16/x16/x8/x8 where the first slot reduces to x8 when the third is occupied.

To add to the confusion, the M.2 slot can either be in PCIe 3.0 x4 mode from the CPU, or PCIe 2.0 x2 mode from the PCH. However the manual has a handy table to tell you what goes where for what:
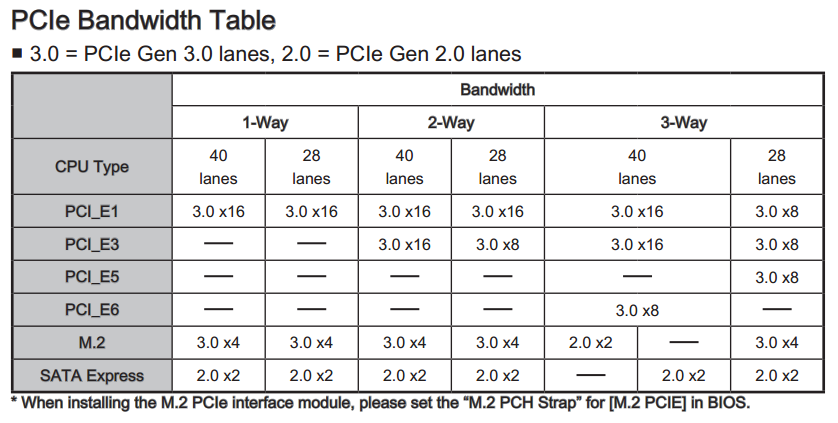
Essentially anything placed into the bottom full-length PCIe slot will reduce the M.2 slot down to PCIe 2.0 x2. Not shown in this table is a technical support for four-way GPU alignment, giving x16/x8/x8/x8, although single slot cards/PCIe ribbon cables would be required.
The left hand side of the board features MSI’s Audio Boost, which is an upgraded version of Realtek’s ALC1150 audio codec with an EMI shield, PCB separation and additional filter caps.
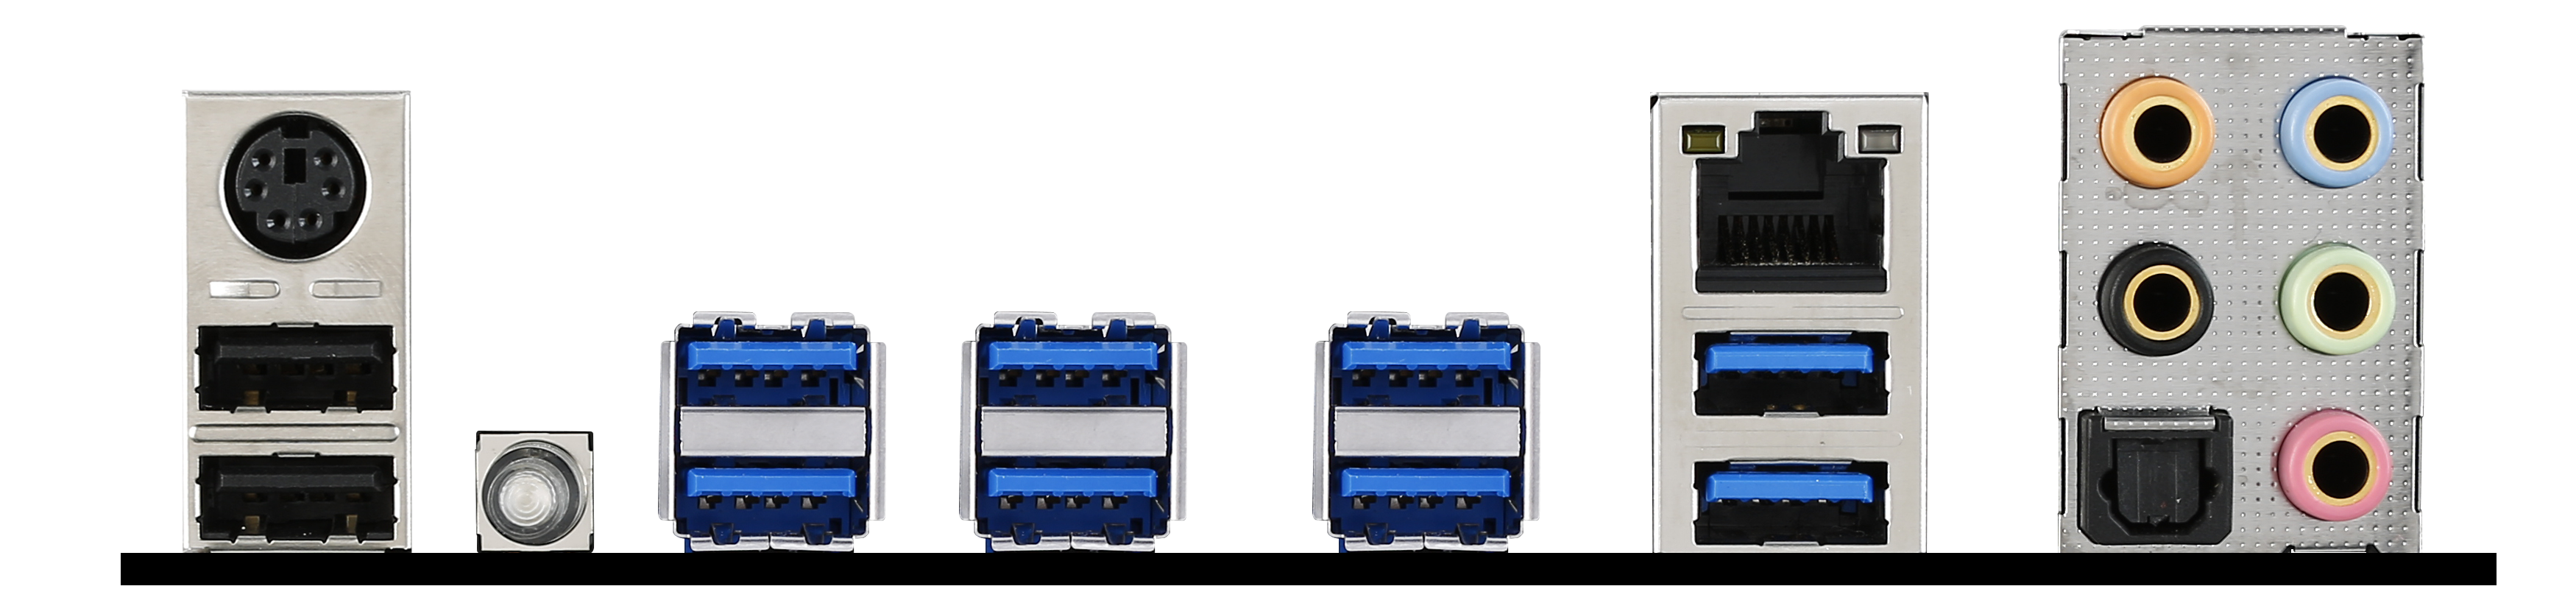
The rear panel of the board gives a combination PS/2 port (in black), two USB 2.0 ports, four USB 3.0 ports from the chipset, four USB 3.0 ports from a VIA VL805 controller, an Intel I210 network port and audio jacks.


Board Features
| MSI X99S MPower | |
| Price | US (Amazon) |
| Size | ATX |
| CPU Interface | LGA2011-3 |
| Chipset | Intel X99 |
| Memory Slots | Eight DDR4 DIMM slots Supporting up to 64 GB UDIMM, 128GB ECC RDIMM Up to Quad Channel, 1600-3333 MHz UDIMM |
| Video Outputs | None |
| Network Connectivity | Intel I210 |
| Onboard Audio | Audio Boost (upgraded Realtek ALC1150) |
| Expansion Slots | 2 x PCIe 3.0 x16 2 x PCIe 3.0 x8 2 x PCIe 2.0 x1 |
| Onboard Storage | 6 x SATA 6 Gbps, RAID 0/1/5/10 4 x S_SATA 6 Gbps, no RAID 1 x SATA Express 1 x PCIe 3.0 M.2 x4, also runs at PCIe 2.0 M.2 x2 and M.2 SATA M.2 supports 2242/2260/2280 sizes |
| USB 3.0 | 6 x USB 3.0 from PCH, 4 back panel + 1 header 4 x USB 3.0 from VIA VL805, back panel 2 x USB 3.0 from ASMedia ASM1042AE, header |
| Onboard | 10 x SATA 6 Gbps ports 1 x SATA Express 1 x M.2 (PCIe 3.0 x4 or PCIe 2.0 x2 depending on setting) 2 x USB 3.0 Headers 2 x USB 2.0 Headers 5 x Fan Headers TPM Header Power/Reset Buttons Base Clock Control Buttons OC Genie Button OC Genie Switch Multi-BIOS Switch Slow Mode Switch Front Panel Header Front Audio Header |
| Power Connectors | 1 x 24-pin ATX 1 x 8-pin CPU 1 x 4-pin CPU |
| Fan Headers | 2 x CPU (4-pin) 2 x SYS (4-pin) |
| IO Panel | 1 x Combination PS/2 Port 2 x USB 2.0 4 x USB 3.0 (PCH) 4 x USB 3.0 (VIA) 1 x Intel Network Port Clear CMOS Button Audio Jacks |
| Warranty Period | 3 Years |
| Product Page | Link |


12 Comments
View All Comments
SantaAna12 - Monday, February 23, 2015 - link
An overclocking review with no side by side brand comparison?Really?
theduckofdeath - Tuesday, March 10, 2015 - link
It reminds me that I really have to get started on reading Metro 2034... :D