MSI Z77 MPower Review: The XPower’s Little Brother
by Ian Cutress on January 26, 2013 10:30 AM EST- Posted in
- Motherboards
- MSI
- Z77
- Overclocking
MSI Z77 MPower BIOS
Over my previous analyses of the MSI graphical BIOS platform, I have often praised various aspects of the design. MSI did a good thing and opened up the design to an internal competition, and picked a winner from that to become the next BIOS (it actually went to 3rd place for technical reasons), and thus they did not go with whatever designer X decided which might be what happens as some of the smaller motherboard manufacturers. I have also liked the information bar at the top of the BIOS, which displays important information about the BIOS and stuff a user or power user should know right at the start, rather than wading through options and menus to get to the crucial information. In the previous analyses, there were a few suggestions to upgrade what I thought at the time was a good BIOS – unfortunately none of these have been taken on board (one suggestion for software did though, more about that on the next page).
MSI have stagnated a little on the BIOS front, and other manufacturers are cherry picking the best bits from the competition in order to meet them head to head with a better overall system. ASUS’ system has been good from the start, and their Easy mode and layout has always been great. ASRock has recently have attacked the BIOS field with an overall nicer looking frontage, better stability, a better arrangement of features, and new features that apply to various niche user scenarios. If this latest BIOS for the MSI Z77 MPower is the best MSI has to offer, then they have been sitting on their laurels behind a nice design while others are overtaking them.
Flashing a Corrupt BIOS
During my use of the MSI BIOS, I came across an error that should be distinctly noted in the review. At the time of writing the review, MSI know about this (as has been reported in other Z77 MPower reviews and on their forums), but the latest public BIOS, V17.6, does not fix them.
Firstly is the recognition of Intel’s Management Engine. For every Intel motherboard, the management engine is a critical part of chipset and processor initialization, and usually pertains to microcode recognition for the processor and other things, such as overclocking options. When the MSI Z77 MPower arrived in my hands, it has Intel ME 7.xx as part of the system, and naturally I updated to the latest 17.6 BIOS which should have included ME 8 as part of the package. After flashing, the BIOS subsequently reported an ME version of ‘N/A’, but allowed me to continue my normal testing routine. After stock testing, I tried overclocking the board, and noticed that the OS software ClickBIOS and Control Center both greeted me with a message ‘Intel ME8 required for OS Overclocking!’. Neither of these applications would allow for on-the-fly BCLK overclocking, so I went back to the BIOS and tried to revert to the old BIOS and the old ME version. I flashed backwards to 17.4 using the BIOS itself, then forward to 17.6, but no change. In order to try something different, I tried going back to 17.4 again, but the system corrupted during flashing. The result of this corruption is that when the motherboard is turned on, it spins up for two seconds, and then turns itself off – no POST messages, nothing on the two-digit debug. A bad BIOS flash is not a completely uncommon occurrence, so I did what I have done in the past – boot on the good BIOS (as the system has two BIOSes I can switch between), and reflash the broken BIOS by clicking the switch back after POST. This did not work, and has been noted by other users. The only way around this according to MSI so far is to use the Intel Flash Programming Tool on a DOS bootable USB stick, and requires obtaining the unique ID of the network card. It is a bit of a faff, something which MSI should have sorted before making the board, and something MSI should publish a guide on how to do it. (In actual fact, there should be an option in the BIOS such that a user can get the board to copy the BIOS from one chip to another.) If a guide is published, we will put a link in here to help, but if you end up with a corrupt BIOS, I suggest making sure you do not update the other until the first one is working again.
The BIOS
As mentioned, the general style of the MSI BIOS is quite nice and pleasant to look at. We get a bar along the top that tells us the motherboard in use (albeit in MSI internal code), the version of the BIOS installed, the CPU installed, the frequency of the CPU, the size of the memory installed, the speed of that memory, the CPU and chipset temperatures and our boot device priority. All that is missing is perhaps a voltage or fan speed or two.
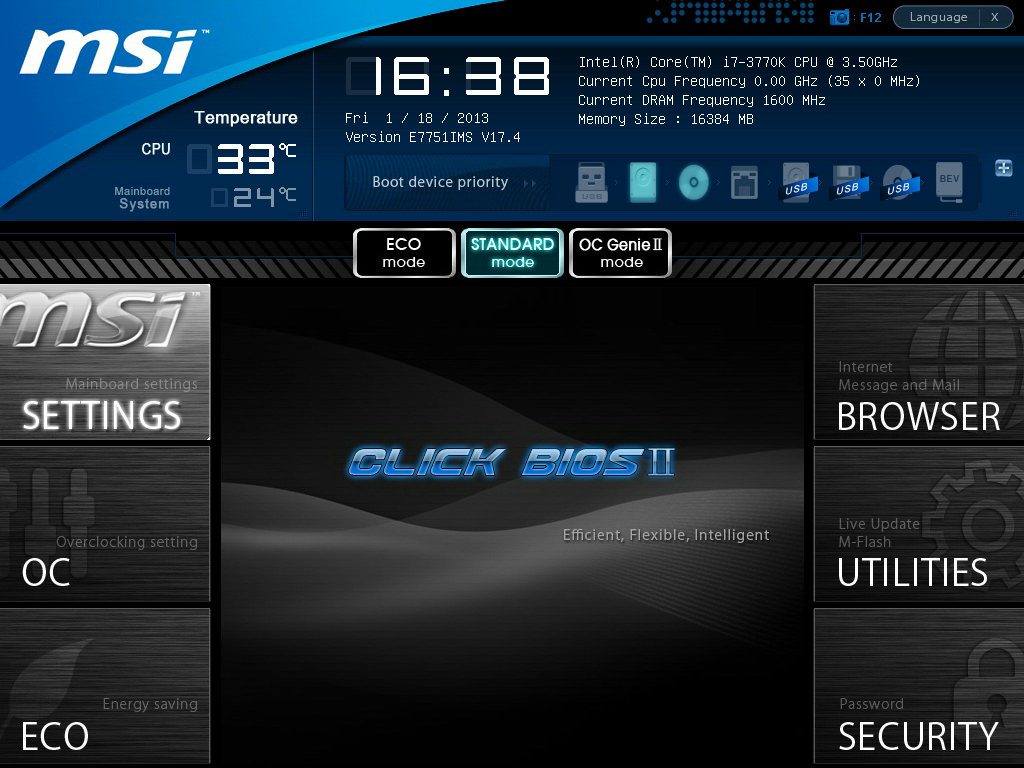
While this top banner is nice, it is incredibly big, taking up about 1/3 of the screen real estate. Throughout choosing the BIOS options, this top banner is constant (which I approve of), but the size of it means that all the other options are limited, leading to a lack of explanation of a lot of options.
In the middle we get three buttons – ECO mode, Standard mode and OC Genie II mode, of which the first uses a setting regime to reduce power, and the third applies the internal OC Genie overclock settings. To the left and right are six buttons for the main areas of the BIOS, and the center of the screen is where our options are.
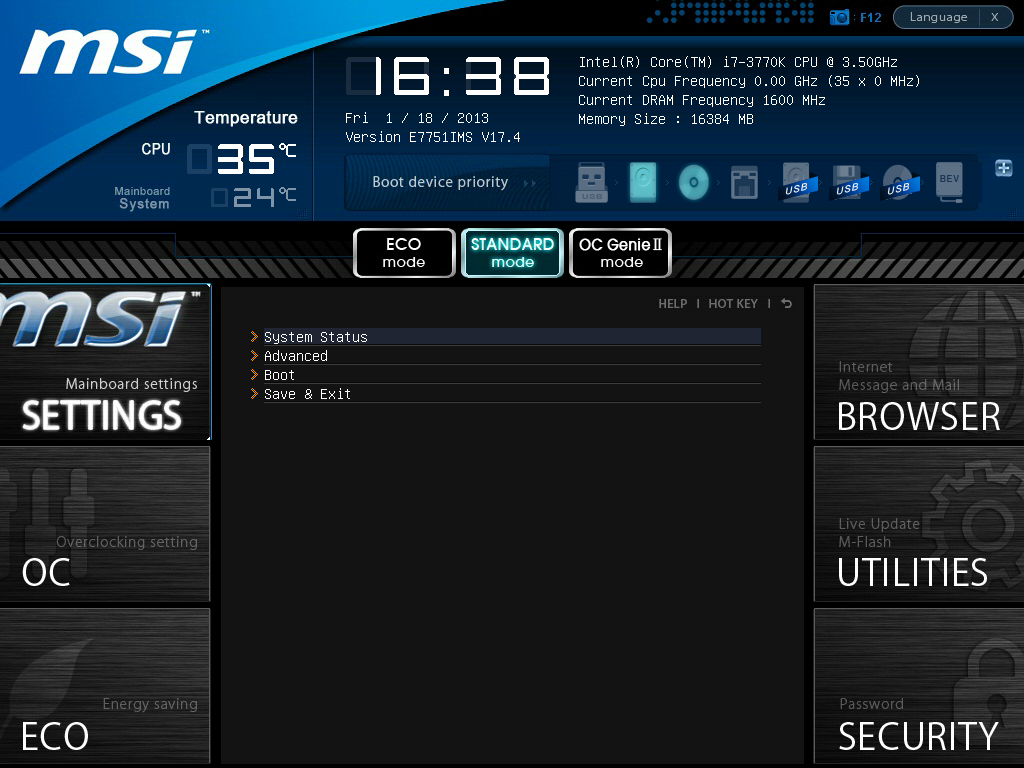
The Settings menu takes us to some more options regarding the system status, the advanced non-overclocking chipset options, the boot menu, and a save and exit menu. The Advanced selection gives us what we normally see under a ‘Configuration’ menu in any other BIOS:
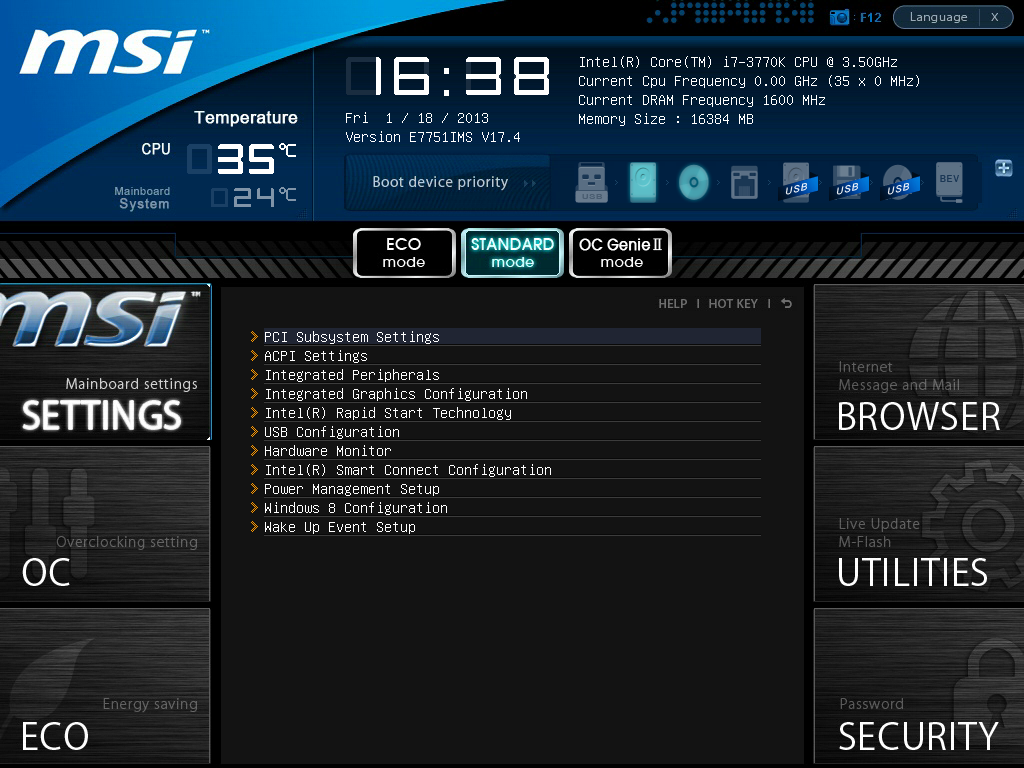
The normal array of SATA, USB, Controller, IGP, PCIe and power management settings are accessed in this Advanced menu. By default PCIe 3.0 is enabled, as well as AHCI, the onboard WiFi, onboard Bluetooth and Intel Smart Connect. If a user wants to run Lucid Virtu or Intel Rapid Start, then these are disabled by default and need to be changed here. The two main sub-menus to look at are related to fan controls via the Hardware Monitor menu and fast boot options in Windows 8 Configuration.
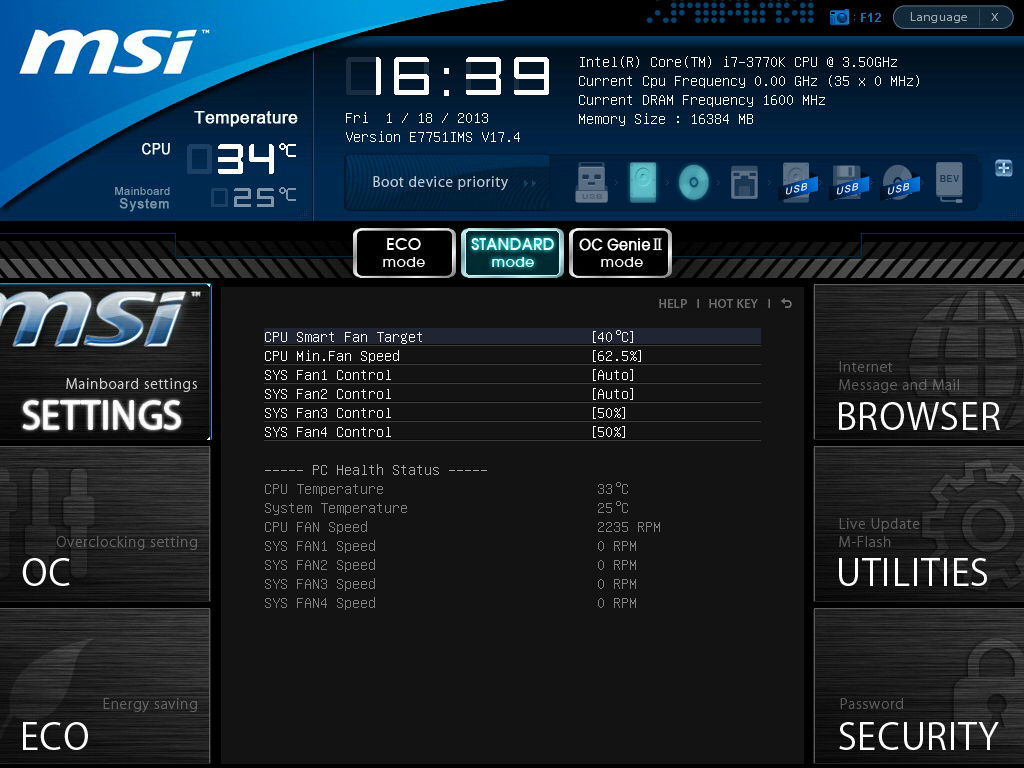
The fan options in the BIOS allow the user to control all the fans, however the options are basic compared to those in the operating system. The CPU fan is a ‘Smart Target’ where the user can choose a target temperature and a minimum fan speed. If the CPU goes over the temperature, the CPU fan will spin up to 100% in order to reach the target temperature again and then power down. The other fan headers get merely percentage options with no connection to system temperatures.
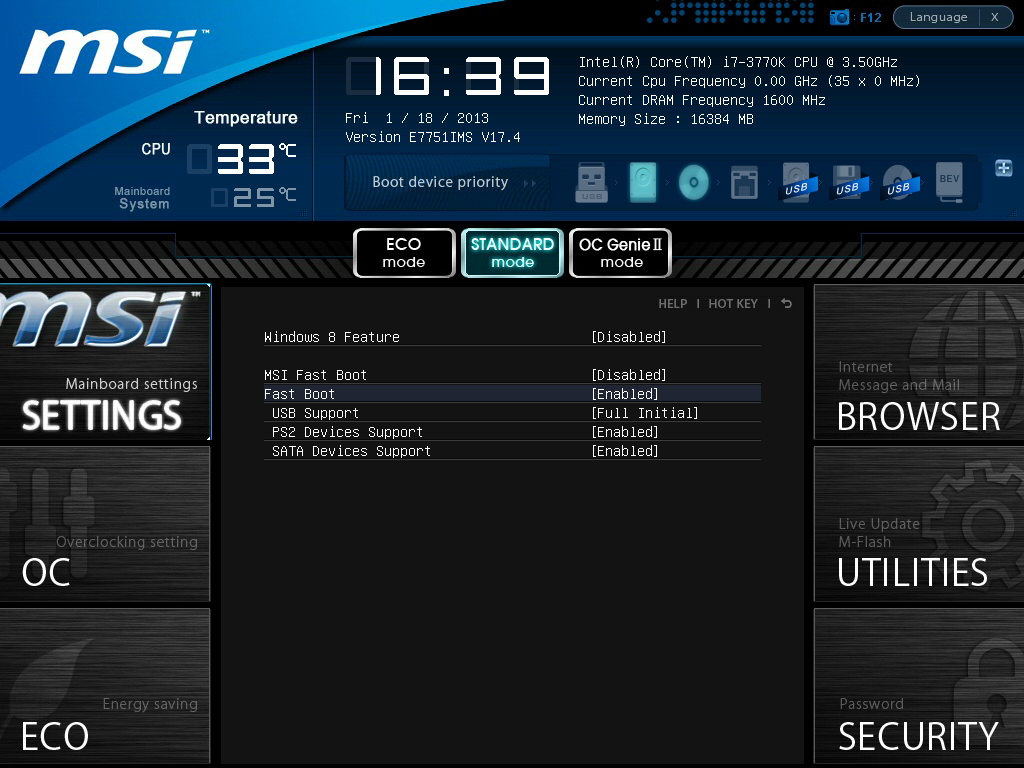
The Windows 8 Configuration options are our fast boot methods, and users of Windows 8 can take advantage of the benefits that the Windows 8 bootloader allows. For non-Win8 users, we can still disable things like USB/PS2 support at boot, which should encourage a faster boot at the expense of not being able to use the keyboard/mouse/USB until an operating system has loaded. Despite these options, I saw no difference in boot speed on Windows 7, with the default and stripped BIOSes still needing ~12.75 seconds to POST.

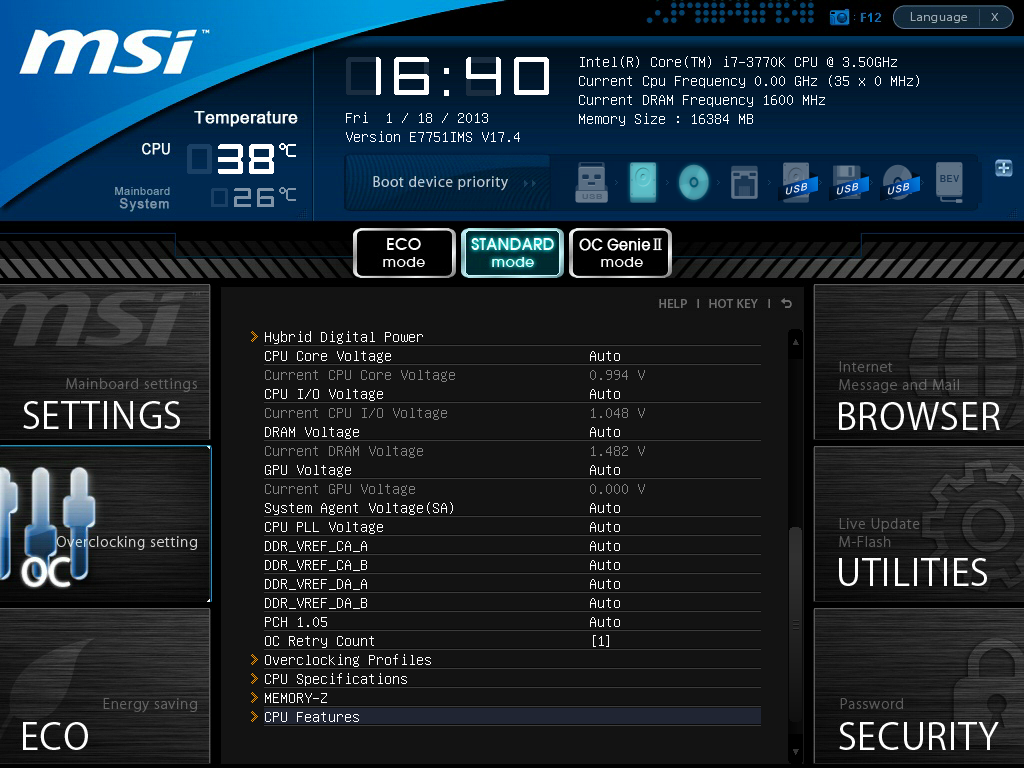
Moving on to the overclocking options and it seems like MSI have dropped the ball quite severely. There is no real order or layout to our functionality, except in the sense that we start at CPU frequency, then turbo options, memory, power, voltages, and finally miscellaneous options. There are no headers, no explanations about the limits of the options or even what the options do. Anyone not familiar with the latest Core architecture will not have a clue what the ‘Internal PLL Overvoltage’ is, or if it is relevant to their processor. In fact there are still some options that leave me stumped, especially in the Hybrid Power menu:
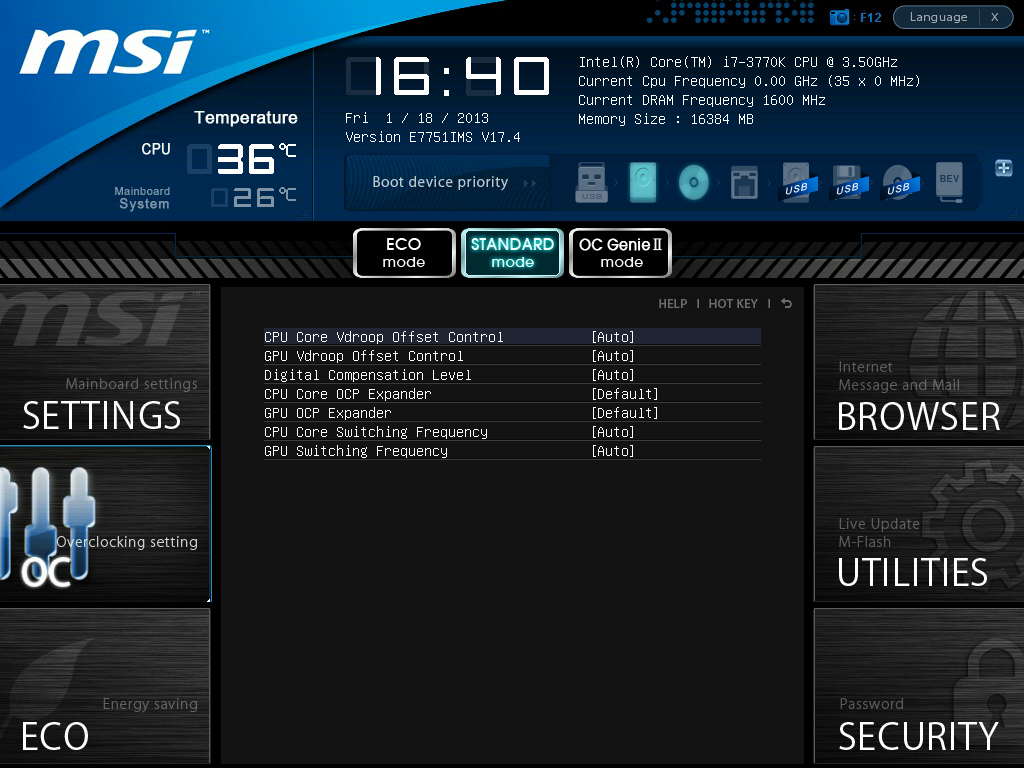
We can essentially interpret the OCP and switching frequency options which are common overclocking terminology, however the VDroop option gives values between 0% and +100% in 12.5% increments. This is in itself odd, and the BIOS does not tell you whether you want 0% or 100% for constant voltage. Does 100% mean you get 100% all the time, or that it drops 100% of the voltage at full load? The Digital Compensation Level option is just as erratic, as it does not tell you what it is compensating or what you want for a good overclock.
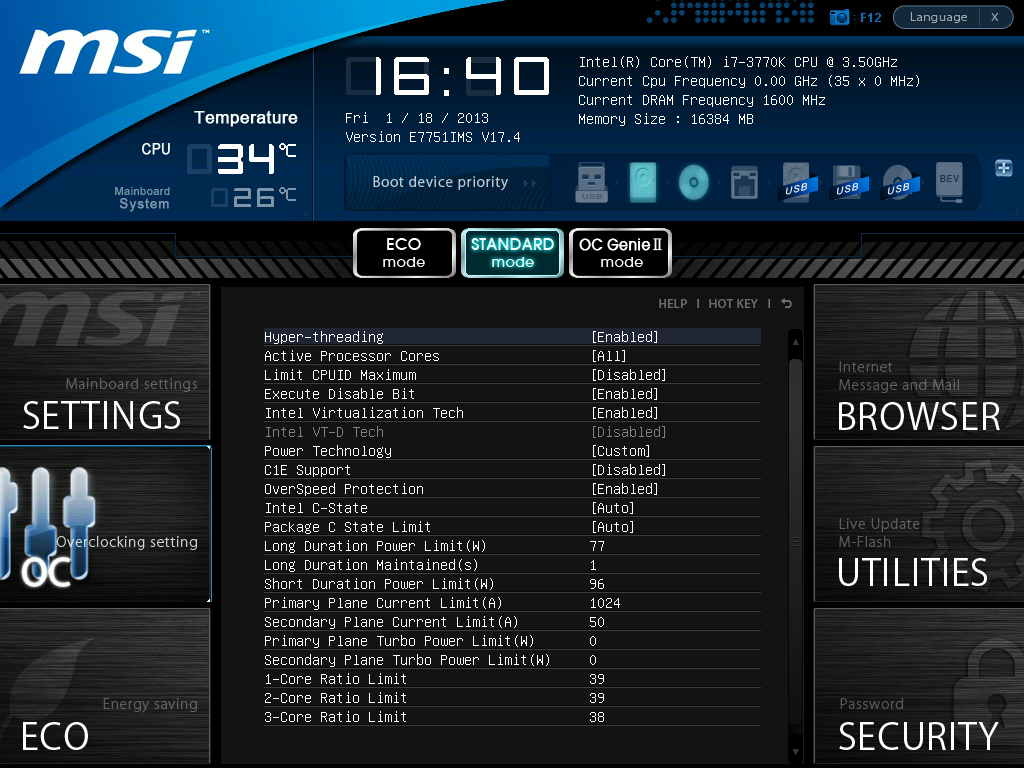
Power limits are all found in the CPU Features menu at the bottom of the main OC menu, although again we get no explanation here of anything. The Power Limits are limited to 255 W, despite the fact that other motherboards give higher power limits on their auto overclocks, and a processor can breach 400W while heavily overclocked on sub-zero cooling.
Elsewhere in the BIOS it should be stated that there are issues dealing the overclocking profiles when using any public BIOS below the V17.6 – even numbered OC profiles seem to be borked, either not saving properly or recalling values from different save files. It seems to be fixed with V17.6 though.


14 Comments
View All Comments
sherlockwing - Saturday, January 26, 2013 - link
I really love the 90 degree USB3.0 port on this board, it makes hiding the large and bulky 3.0 connector so much easier.This was one of board I considered before I bought my UP5-TH. Unforunately this board like most MSI boards use analog VRMs and MSI Bios don't allow Offset Overclocking so I went with the UP5-TH instead.
Blibbax - Saturday, January 26, 2013 - link
What exactly does this board need to be a top-notch overclocking board?IanCutress - Saturday, January 26, 2013 - link
A revised BIOS layout for options, a fully working software package that allows overclocking without issues in the OS (for digital power delivery options as well), and a series of automatic overclocking options for users that are unsure about overclocking but want more than the 4.2 GHz that OC Genie provides. There are a couple of boards in the $240-$280 range that adjust the VRM heatsinks to allow water cooling as well. Extreme overclockers would perhaps enjoy switches to disable PCIe slots, a wider variety of temperature probes on board, onboard on-the-fly adjustment buttons and a super level of BIOS options for skew, slew et al.Ian
NitroWare - Saturday, January 26, 2013 - link
The Intel ME is no longer solely ganged to the primary firmware and has not been for a while.Intel's package allows the ME to be invidually flashed or recovered using a number of bundled tools from DOS or Windows . Grab the ME pack either from the board OEM,Intel or station-drivers if you want to use the bleeding edge build#
If you are lazy, you can use asus's updater as it has been QA'd for end users IntelME81_Updating_Tool_V10001.zip from any ASUS Z77 download page, which is just Intel's flash tool and binary bundled with a custom ASUS front end which doesnt really work too well especially if you need to downgrade or reflash - they forgot the decision trees in the front end, but Intel's tool works well.
This will either contain a installshield or loose files
The Intel tools you are looking for are in neatly organised folders. MEtool.exe and FWUpdLcl64.exe, found in a variety of packages especially the ASUS package
both have context senstive help to dump version#s, recover, or force/flash the ME.
There are 2 sizes of ME for v8, 1.5MB and 5MB. Consumer Z77 use 1.5MB, I dunno what the 5MB one is for, maybe vPro systems
I cannot see any OEM custom builds as the binary comes from Intel, but each OEM releases a slightly older or newer buld depending on random reasons. I have used bleeding edge builds on various mobos without issue but that is something for personal preference.
I honestly can' remeber if you can flash v7 to v8 as it has beren a while since I have however last year for releaser of Ivy Bridge, Cougar Point (7 series) and Win8 some mobo vendors such as ASrock did a complete overhaul of their UEFI BIOS and updated all of the modules to the latest standard.
Z77 boards should have come with v8 or v8.1 ME anyway, I can't see why theyd ship a v7.
ASUS provided a end-user recommended update to 8.1 to 'enhance windows 8' as above.
Intel Desktop Boards support 8.1 also.
One wonders why they dont take this approach with the RAID OROM, as its just a BIOS module anyway.
NitroWare - Saturday, January 26, 2013 - link
I forgot to add that some third party vendors such as NEC-Renesas and ASmedia make it painful to flash the firmware for their products. ASmedia needs a DOS boot disk afaik.Some other vendors make it dead easy.
Why do you feel a one touch OC key is needed? Do you not think this is a gimic? It may be handy for bench testing but everything should be point and click or at least front bay controlled once the system is built up.
Sabresiberian - Saturday, January 26, 2013 - link
One of my "pet peeves" with mainboards is that the socket layout is terrible on pretty much all of them - regardless of size of board. They don't even take advantage of having more room in an E-ATX, XL-ATX, or what have you.This board has one of the best layouts I's seen in the sense that I could actually install 2 PCIe-1 devices even after installing 3 graphics cards! Unfortunately, that would make the graphics cards run on 8x-4x-4x and isn't enough for me, but still, it is a tempting board just for the socket layout. Most boards won't even allow for 1 PCIe-1 device if you have 3 graphics cards installed. It's ridiculous, in my opinion.
I love the color, too. Nice thing about black - it pretty much goes with anything, so even if my memory and graphics cards didn't match in color scheme, the mainboard wouldn't really add to a color confusion explosion. The yellow areas are small enough that they won't have much of an impact (I think).
I have built more computers based on MSI mainboards (hence my exposure to and acceptance of a term I like better, "mainboard" :) ) than any other brand, and they've always been reliable. I tend to prefer Asus these days for high end, but would always consider an MSI offering.
mayankleoboy1 - Sunday, January 27, 2013 - link
With someVRM moving to the CPU in Haswell, i expect the mobo to get a cleaner layout. Or that the space could be used for cramming some additional stuff. Not sure which i would prefer....cjb110 - Sunday, January 27, 2013 - link
You mention that there's no help on-screen, but are the BIOS settings detailed in the manual though?As I'd say that's acceptable, maybe not for the target market (that would more likely be changing settings regularly), but for a general user a once-off trip to the BIOS with the manual next to you would be fine.
peterwhitehouse - Sunday, January 27, 2013 - link
Surely this is not true for Windows 8 as that has native USB 3.0 support?Perhaps if we ever see a Windows 7 SP2 that may possibly support USB 3.0 natively as well.
peterwhitehouse - Monday, January 28, 2013 - link
I have checked this today and Windows 8 does indeed support USB 3.0 ports during install as suspected so I guess we can cross off having lots of USB 3.0 ports on the rear as being a possible downside.