NZXT Kraken G10 Review: Liquid Cooling for Your GPU
by E. Fylladitakis on March 11, 2014 1:15 AM EST- Posted in
- Cases/Cooling/PSUs
- NZXT
- Water Cooling
- Kraken
- G10
The Kraken G10

Essentially, the Kraken G10 is just a steel bracket that locks onto an Asetek-based round waterblock and allows its installation on graphics cards. NZXT offers the Kraken G10 in three glossy colors: black, white and red. We received the black version of the bracket.

The paintjob is very good at the top of the bracket, with a very clean glossy finish, yet it's not very good on the bottom side of the bracket, as it is uneven and even sagging near the edges. It is the top side that will be visible once the cooler is installed on a card, yet a more careful paint job would not hurt. The company logo is etched on the side of the Kraken G10, in direct line of sight from a side panel window. Two large cable tie mounting points can also be seen, which can be used to hold the hoses and/or the cables of the liquid-cooler.
Installation
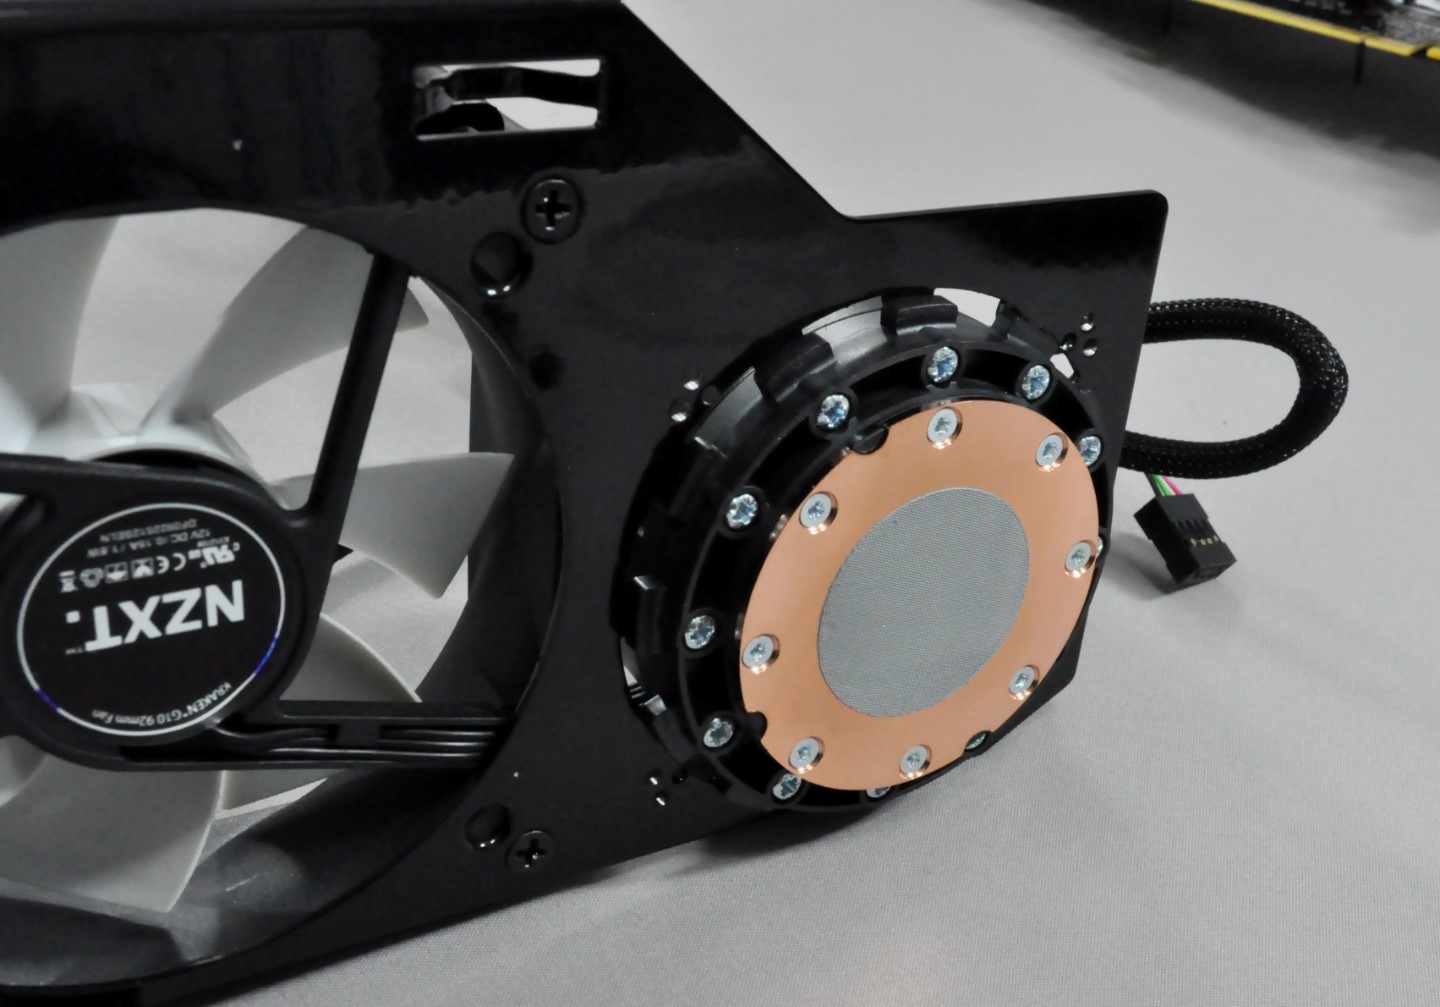
The installation of the Kraken G10 is fairly easy. Once the stock cooler of the graphics card has been removed, the 92mm fan should be installed on the bracket with its engine facing upwards. Then the bracket can be easily installed on the liquid-cooling block by using the same plastic locking ring included with the kit's CPU installation hardware. Ideally, the hoses should be facing towards the front side of the bracket, as the cable ties can be used to hide them behind the bracket.
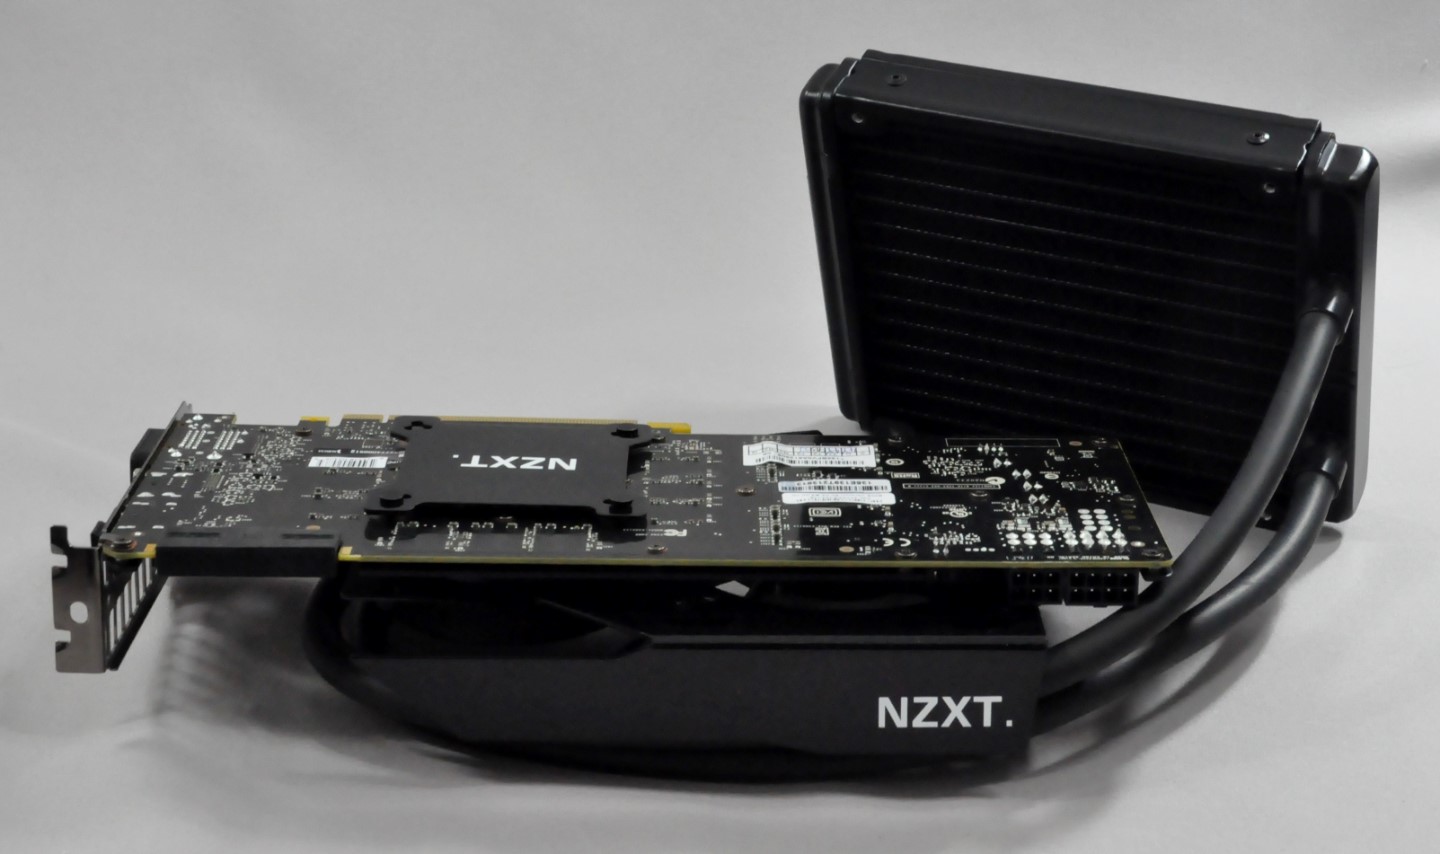
Once the block+bracket assembly is complete, it is a simple matter of using the backplate and installation screws included with the G10 in order to attach it to a graphics card. The installation of the Kraken X40 kit with the aid of the Kraken G10 on an EVGA GTX770 is depicted in the gallery below.
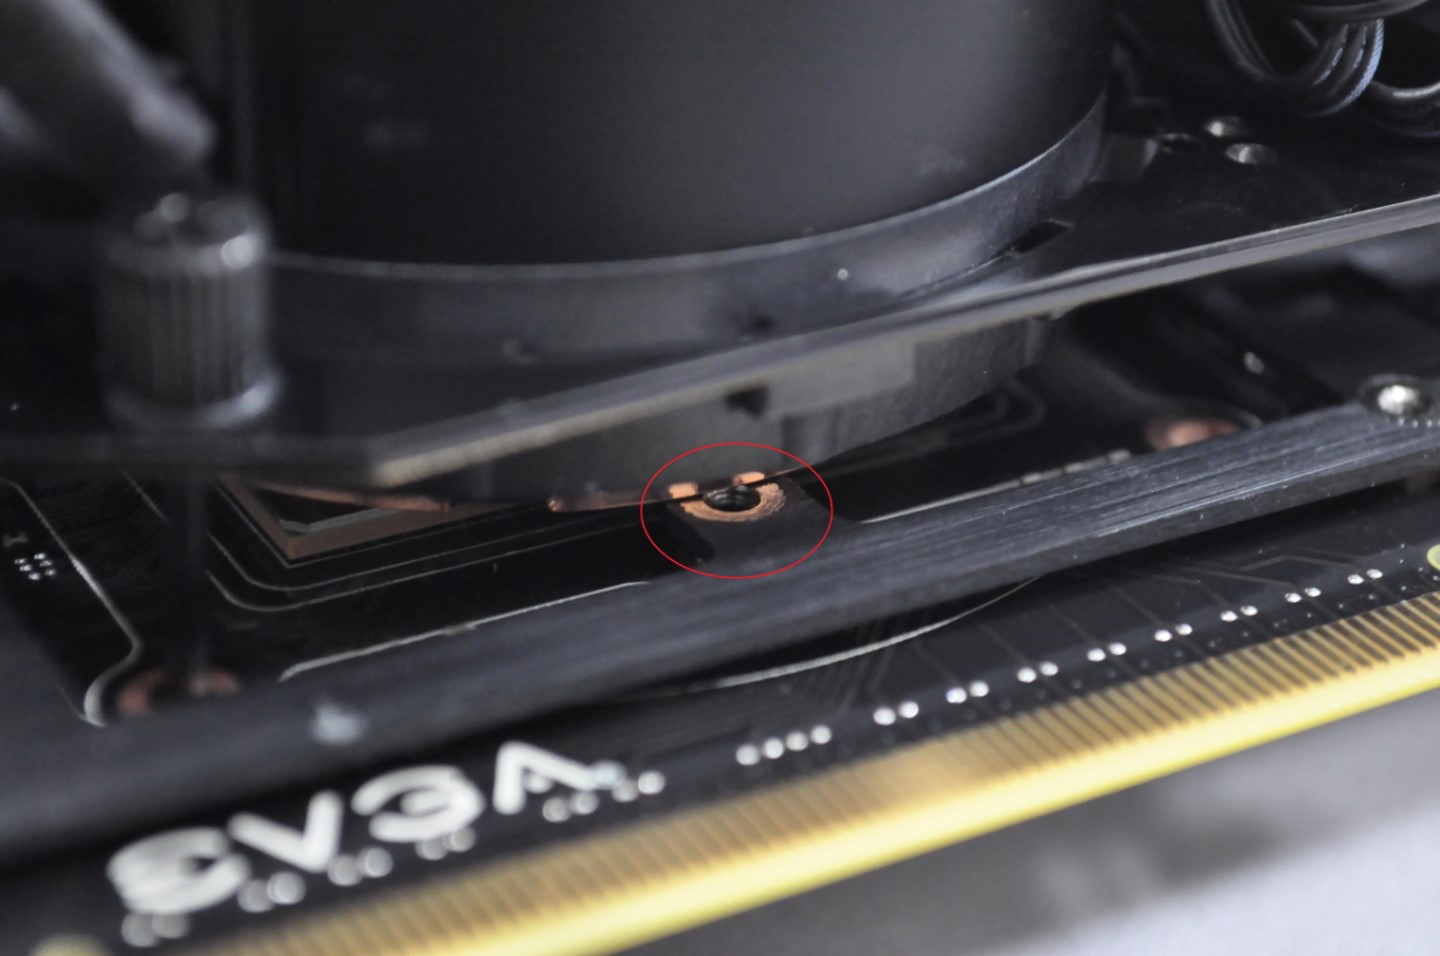
Note that it may be necessary to remove more than just the main cooler of the graphics card; as shown below, the RAM/VRM heatsink of the graphics card prevented the block from seating on the GPU and had to be removed as well. This will vary according to your choice of GPU/card.


61 Comments
View All Comments
owan - Tuesday, March 11, 2014 - link
The increase in fluid is only a cooling benefit until the system comes to equilibrium, at which point it becomes meaninglessmpdugas - Friday, March 14, 2014 - link
Of course, the CPU/GPU temperature is rarely at a steady, equilibrium state...Aikouka - Tuesday, March 11, 2014 - link
Before I built my first custom loop, I did a bunch of research into parts and such. One of the first things I stumbled across was a two facts about water cooling. (1) After a certain point, you don't gain much from increasing the flow rate. (2) It takes a large amount of coolant for the sheer volume to have a tangible effect on temperatures.The usual rule of thumb in water cooling is to use a LITTLE hose as possible. In *most* implementations, hoses are not designed to disperse heat unlike other items in the loop. So, unless you're one of those crazy types that uses copper tubing in their water cooling build, there isn't much of a point to excess tubing. Also, excess tubing can be just about as bad as too little tubing in that you can end up with some awkward bends. In my experience with AIOs, they aren't exactly known for using great clamping methods on the tubes. I recall reading complaints about leaks, and the users in questions had very tight bends, which I could see causing gaps between the rubber tubes and the barbs.
1Angelreloaded - Tuesday, March 11, 2014 - link
OK you are right, but wrong as well, see the pump supplies so much pressure per foot of available volumetric area, when we talk about pumps we typically discuss a statistic called pump head for that reason, you typically don't want 2 much head for a small loop otherwise the Bar pressure levels will be 2 high and most likely you will have leaks for most acrylic res containers, now if the head is 2 low you will have little pressure within the system and a low flow rate which is bad for a CPU cooler block that work better under a higher volume rate, 2 slow and the fluid will boil causing gas within the lines and catastrophe. GPU cooling is entirely different and because the Blocks are of a larger displacement they function better under lower pressure levels. Now how this would apply to an All in One cooler is beyond me but remember the original design is for a CPU not a GPU, a CPU can hover between 30-50 cel while a gpu can climb all the way to 90 cel, so I am not sure how I feel about this, My question would be more can This fit an EVGA 760 ACX SC 4GB and will it work with Corsair's Link software if it will an SLI 350D would be an interesting prospect.tim851 - Tuesday, March 11, 2014 - link
"One such limitation is that the fans of the liquid-cooling kit cannot be thermally controlled in relation to the temperatures of the graphics card."1) There is software, which can control fans and read GPU temps, like SpeedFan (at least for nVidia GPUs, last time I checked three years ago).
2) There are adapter cables, which let you connect a standard 3-pin fan to the 2-pin mini connector of a graphics card.
Yungbenny911 - Tuesday, March 11, 2014 - link
Or you can just get a fan controller for 20$. I have my 4 corsair fans in push pull config, and they are all controlled by my 600t's fan controller. MSI Afterburner's OSD is used to monitor the temp of the GPU as i am gaming, so i know when to ramp up the fans, or reduce them.E.Fyll - Tuesday, March 11, 2014 - link
1. The fan of the kit are not connected on the GPU, therefore they cannot be controlled by any such software. If the motherboard supports fan control on the header the fans may be attached to, then the speed of the fans may be controlled, which control will however be unrelated to the temperatures of the card.2. Yes, there are. These however are a) not included and b) the high amp draw of a 140 mm fan can easily fry the circuit of a card that was designed to drive fans 1/3 of that size. :)
thewhat - Tuesday, March 11, 2014 - link
"If the motherboard supports fan control on the header the fans may be attached to, then the speed of the fans may be controlled, which control will however be unrelated to the temperatures of the card."SpeedFan lets you automate the speed of any fan* based on any temperature in the PC (CPU, GPU, chipset, HDD,...).
*with the possible exception of the fans on Nvidia cards. AFAIK for now it only lets you read the temps, but not control the fan speed on the video card itself. With AMD cards, you can do both.
Aikouka - Tuesday, March 11, 2014 - link
Aren't some GPU fans around 80-90mm? I believe my Gigabyte Windforce card uses 75mm fans, but that's also three fans compared to just one 140mm.Nirvanaosc - Tuesday, March 11, 2014 - link
SpeedFan for the win! (if you use Windows)I use it and it's even better than letting the card control the fans because you can customize the